BLOG

MULLIGATAWNY

Mulligatawny (pepper water) is a beautiful traditional Indian spiced soup/curry originally made with lentils/daal. Typically vegetarian, however there are many versions of mulligatawny including the British version of the soup/curry with added meat.

I love this recipe due to it’s subtle flavour which I found very tasty. As a Cambodian, I love cooking curry with coconut milk because of the creamy flavour it gives to the dish. Like many other Indian curries, Mulligatawny has the same cooking base of onion, garlic, ginger paste and tomato and it’s own curry base. The reason I mention it has it’s own curry base is because if you haven’t noticed, most curries you find in your local market or Indian restaurants use the same curry base to cut ingredient costs and reduce preparation times.

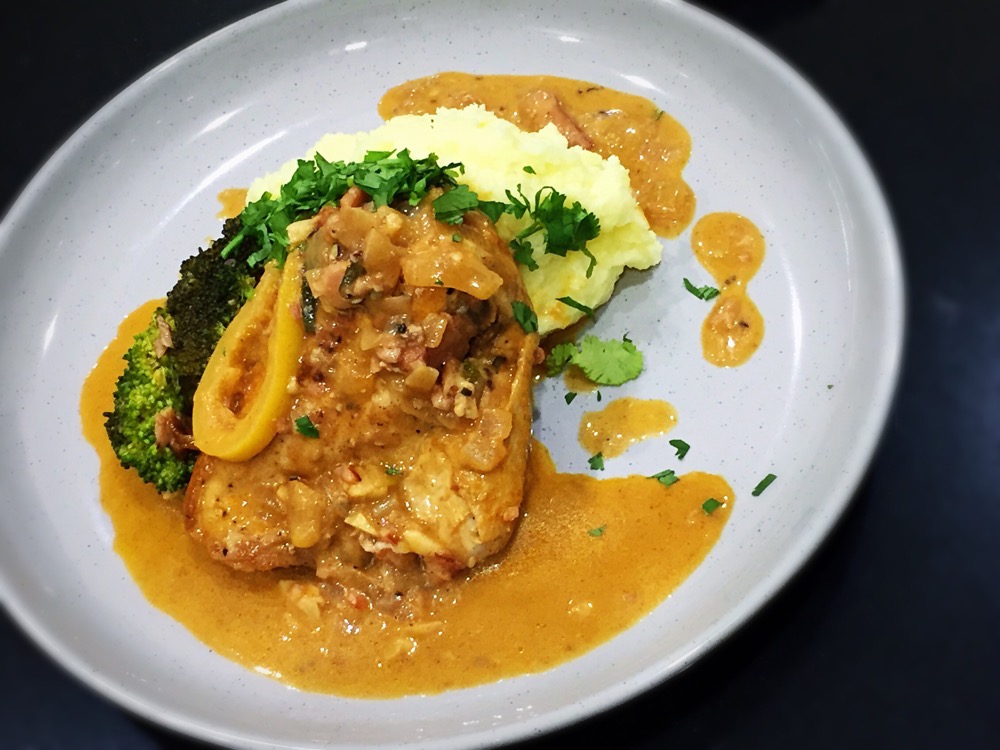
The way I see this dish is as a simple and delicious chicken curry, I hope you give my recipe ago or use it as a base and make your version of it.

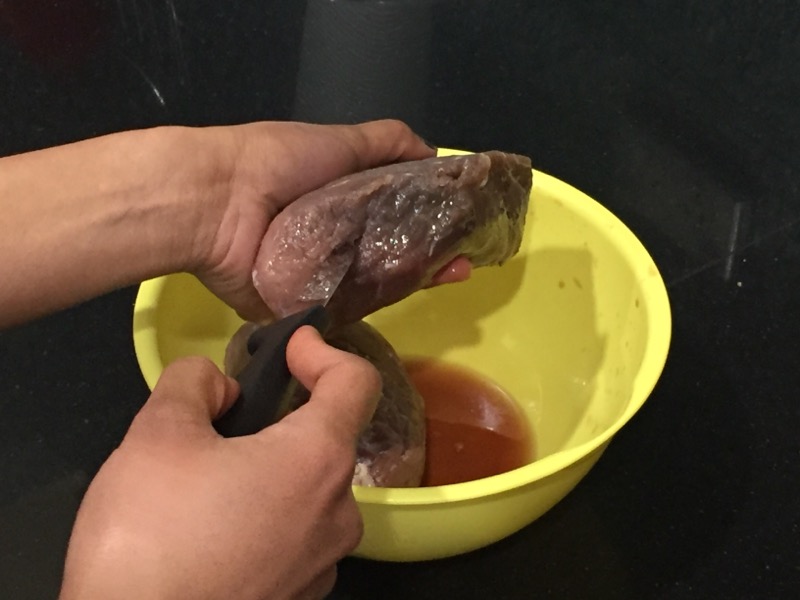
Note: I use fresh ingredients for every dish I cook unless they are unavailable. For the ginger and garlic paste in this dish I made them myself from scratch. Alternatively, if you want to save time and effort feel free to use pre-made chopped garlic or ginger in a jar from your local supermarket.

Personally I think curry tastes best with meat on the bone because it generally doesn’t get as dry as with breast meat or other lean meats. However not everyone likes bones in their food so feel free to use any part of the chicken you prefer.


MULLIGATONY 

Prep-Time: 10 mins                 Serve: 4

Cooking Time: 35 mins

Ingredients 

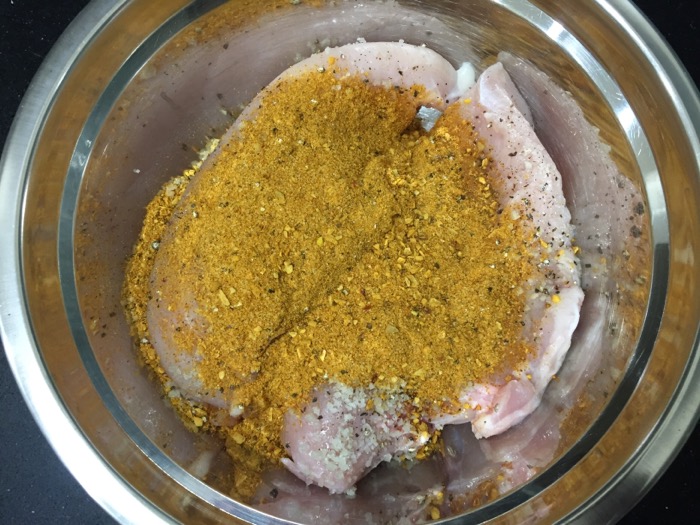
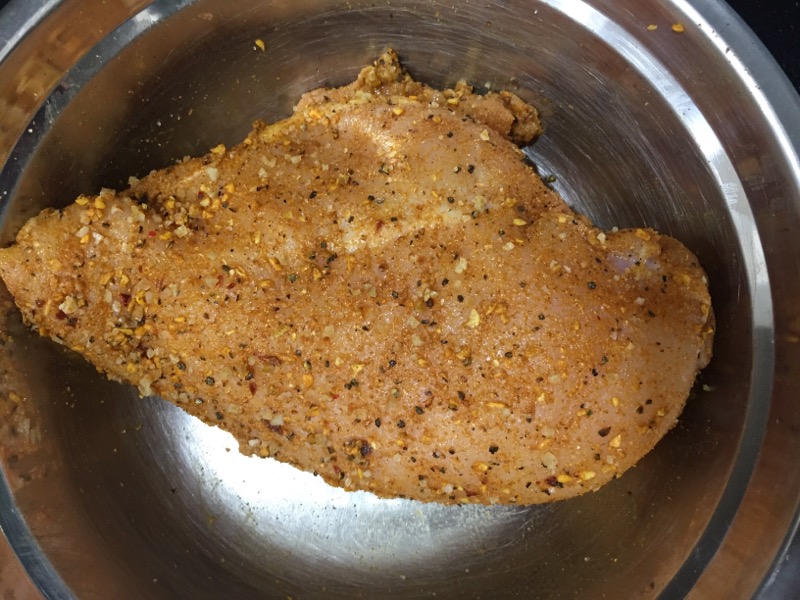
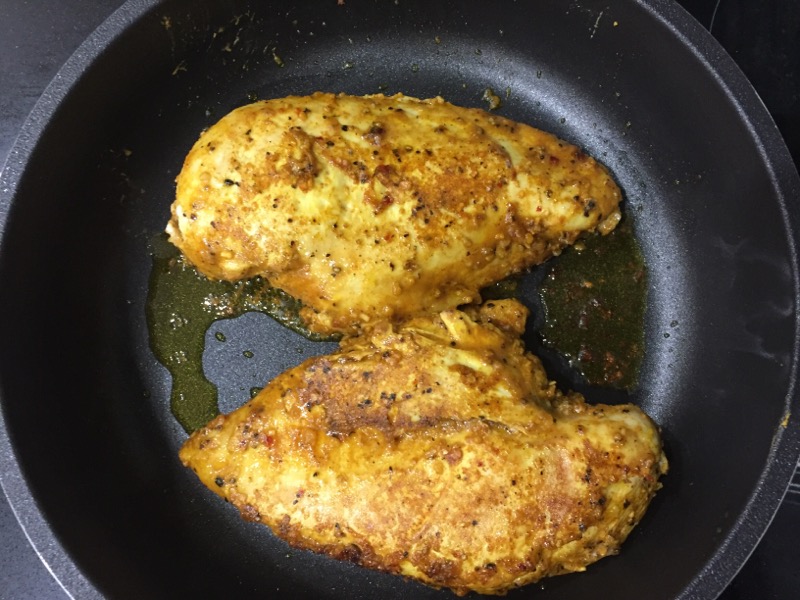
2 chicken breast / 3 maryland, chopped

1 onion, chopped

1 thumb sized ginger

4 garlic cloves, chopped

5 fresh chillies, chopped

1/2 tbsp turmeric

1 tsp ground coriander seeds

1/2 tsp garam masala

1/2 tbsp paprika / chilli powder

200ml coconut milk

1 lemon juice

2 tsp almond flake

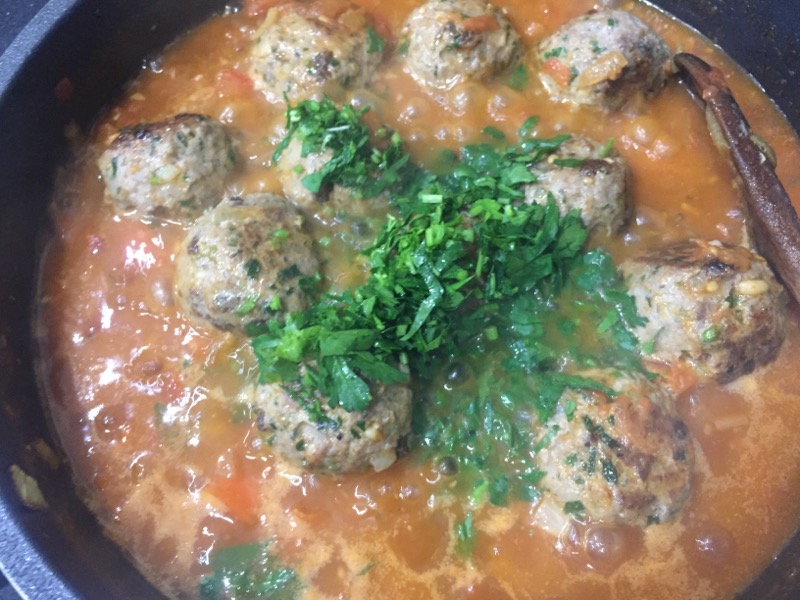
2 tbsp coriander leaves, for serving

1/2 cup water / broth

4 tomatoes, diced small

5 tbsp oil

3 carrots, chopped

Salt

Method 

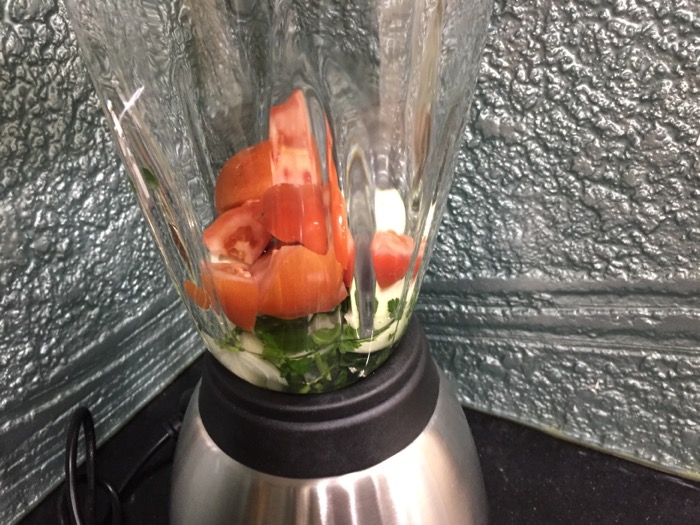
Ground the chillies, garlic and ginger in a mortar and pestle or blend in a blender until finely grounded and set a side.

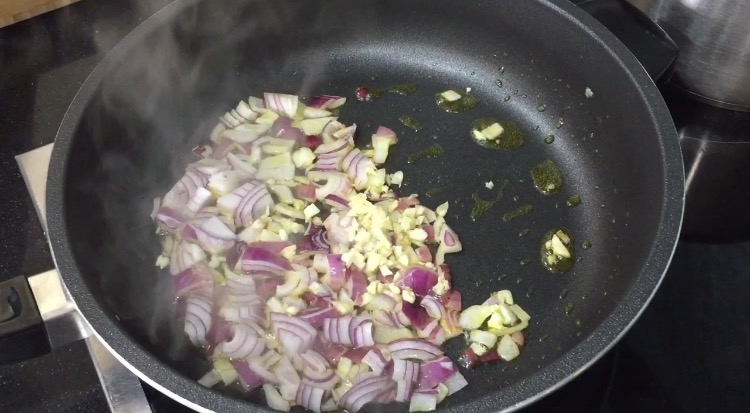
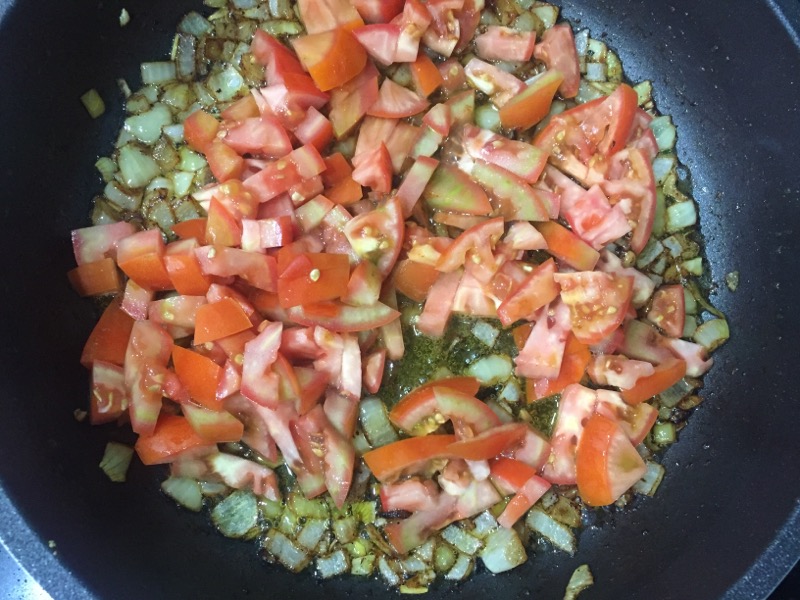
Heat the oil in a pot over medium high heat, add in the onion once the oil has been heated and then cook for 3 minutes or until it turns transparent and cooked through. Add in the ginger, garlic and chilli paste and then stir to cook for one minute or until it start to fragrant before adding in the spices: chilli powder, turmeric, coriander seed and garam masala. Stir for another 1 minute to allow the spices to fragrant.

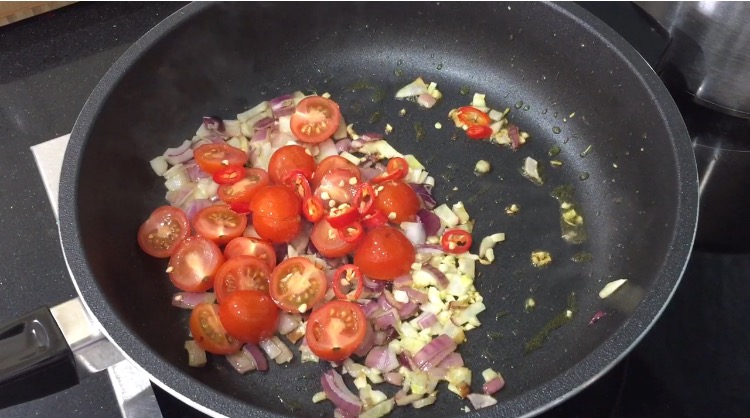
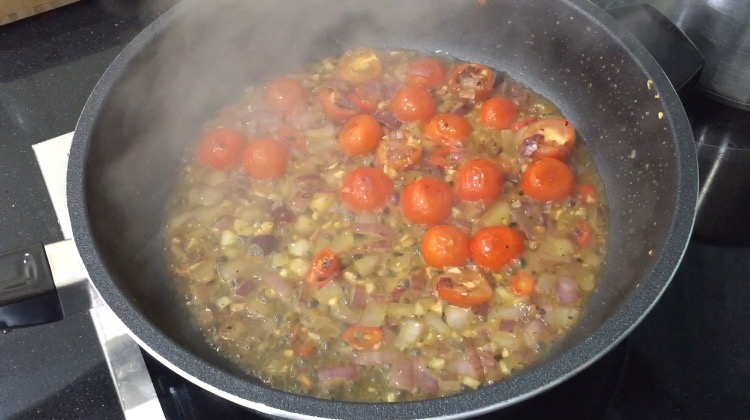
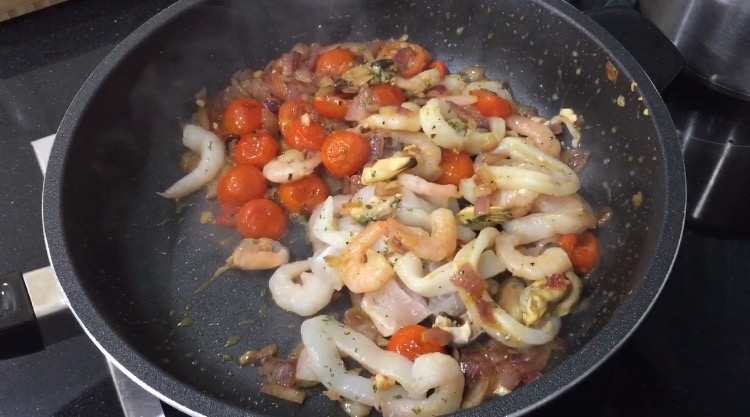
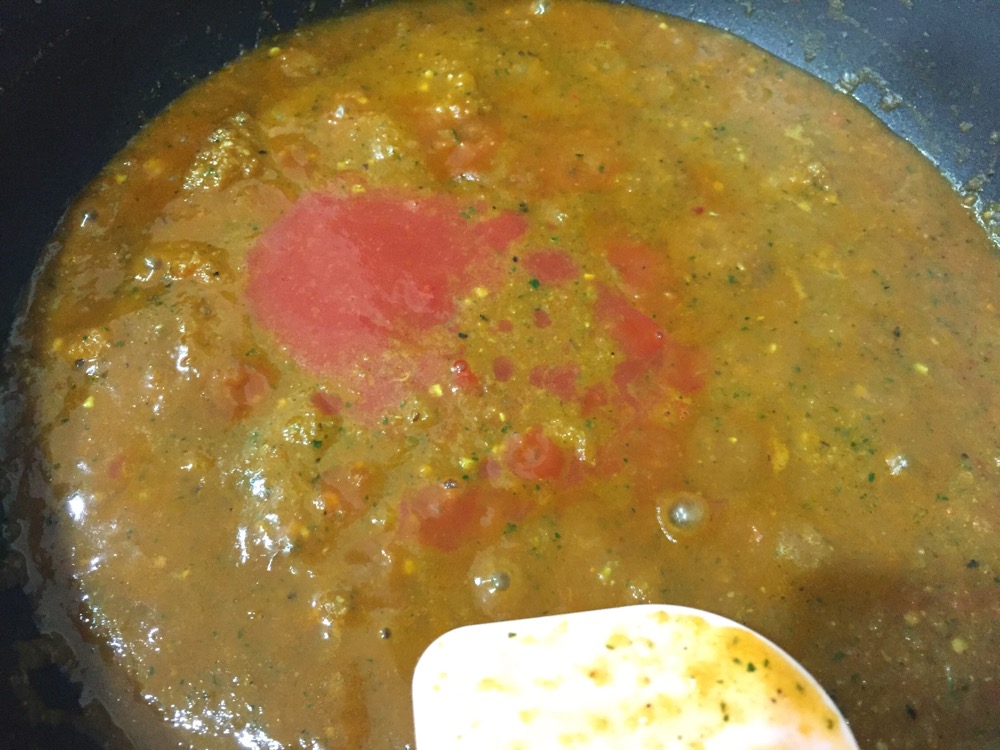
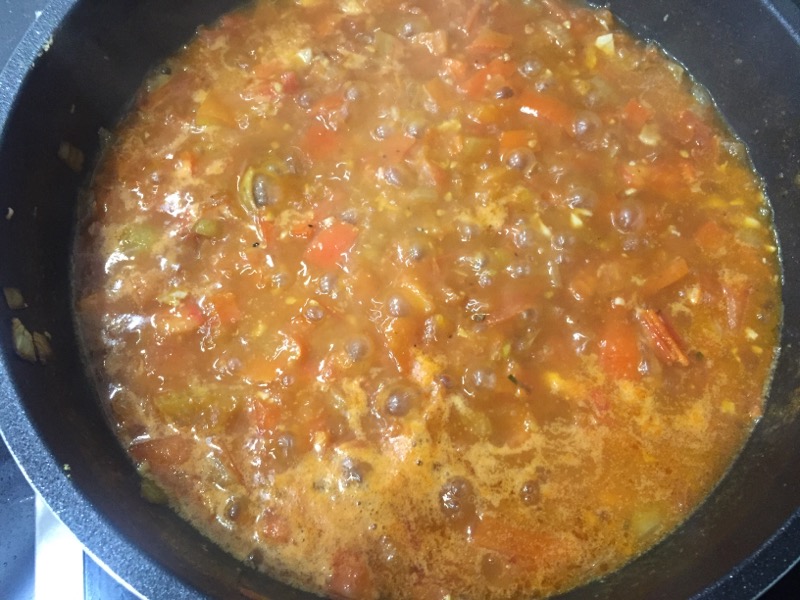
Now toss in the chopped tomatoes and stir through allowing them to cook until they soften for 3 minutes. Add in the chicken and carrots and then stir to mix with the spices. Let the pot cook for 3 minutes and then add in the water. Turn the heat to high and bring the pot to a boil. Pour in the coconut milk and salt (add enough in to taste) and then leave it to cook for 15-20 minutes. After 20 minutes add in the lemon juice, stir to mix and it is ready to serve with rice. Sprinkle the almond flakes and coriander leaves on top of the served curry. Enjoy!


LEMON PAPRIKA CHICKEN

Lemon chicken! I’ve heard a lot about lemon chicken but never thought of making it because the recipes that I used to pass by aren’t the ones that draw me in. So honestly I’m not sure how other people make there lemon chicken, but this is how I made my. Like always I like to cook from scratch with fresh ingredients and what I have in the fridge. Before you go anywhere, finish checking my recipe. I can almost guarantee that you will like it! I enjoy cooking for people and I love to hear them saying that it’s good as well as seeing the smiles of satisfaction on their faces. I also enjoy sharing my recipes and helping to brighten up your lives as well! I’m not an expert yet, but knowing what ingredient goes with what is important so it doesn’t hurt to use your imagination and creativity in cooking.

This recipe has a creamy sweet sour flavour to it, when it just starts to cook it may taste more sour and you may probably think that it’s best to remove the lemon from the dish to reduce the sourness. Not to worry, I used a bit more than half a lemon and the sourness was first a bit overwhelming but as I let it cook longer and simmer down the flavour changed. The result was amazing, my lemon rind was beautiful-the bitterness was gone and sourness blended well with the cream and wine, it goes so well with mash or roasted veggies. Totally a restaurant standard, I wouldn’t mind having it twice a week. Give this one a go and I hope you are excited about it as much as me. I would love to see your version of the recipe!

Note: everyone has different tastes when it comes to food. I love how my recipe turned out, but if you feel like you won’t really like it too sour I recommend using less lemon and probably try the recipe with a semi-sweet wine instead. Feel free to use wine from the winery that you like. 

I cook my onion before adding it into the pan to simmer down, the reason I did so is because from experience it helps to make the dish taste better when the onion is cooked throughly. Also when cooking food separately before bringing them together helps to produce new flavours, so instead of cooking the raw food together and have their flavour combine straight away the foods are cooked in their own environment and produce a slightly different flavour from when they are combined. So once you add them together after cooking it helps to enhance the flavour even more.  


LEMON PAPRIKA CHICKEN 

Prep-Time: 15 mins                     Serve: 4

Cooking Time: 45 mins

Ingredients 

1 chicken, quartered

1 onion, chopped

1 tsp hot paprika

4 sage

1 tbsp dried tarragon

3/4 cup cooking cream

4 slices lemon

2 slices shortcut bacon, chopped

3 cloves garlic, minced

1 1/2 cup white wine

1 cup water/stock

Salt and Pepper to taste

5 tbsp olive oil

Method

Heat 2 tbsp oil in a pan over medium high heat, add in the onion and cook for 3 minutes or until it turns transparent. Toss in the bacon and cook for 2 minutes and then add in the garlic and continue to cook for further 3-5 minutes or until the onion and bacon are cooked thoroughly. Transfer into a bowl and set a side.

Season your chicken on both sides with salt and pepper. Heat the best of the oil in the same pan over medium heat, once oil is nice and hot add in the chicken and sear both sides for 3-5 minuets each or until it turns golden brown. Sprinkle paprika on the browned chicken and then return the cooked onion in to the pan, stir for 1 minute. Now pour in the wine, turn the heat to high and leave the pan to simmer for 5 minutes to get rid of the alcohol content.

Place the sliced lemon on top of the chicken, add in the tarragon and sage and then stir and leave to simmer for a further 2 minutes before adding the water, salt and pepper to taste. Stir the mixture then cover the pan with a lid and leave it to simmer for 30 minutes or until the sauce reduces, turn the chicken over now and then. After the sauce has reduced, add in the cream and let the cream simmer and then add in some broccoli. Cook for 3 minutes in the sauce and remove from the heat and serve with mashed potato.


PEAR CRUMBLE

Imagine a bed of fruits as a base at the bottom of a dish and covered with a layer of crispy crumble on top mainly made from oats, butter and flour. Best eaten with ice-cream, but always great on its own. I’m not a big fan of sweets and I’m not a sweet tooth. I don’t mind have a dessert now and then, but this is mainly made for my partner who loves apple crumble which I normally make just for him. Recently we’ve been buying so many pears and we can’t eat them all so I decided to make a pear crumble rather than putting my pears to waste. In my crumble recipe I often add lemon juice to get a pinch of sour in the base, because I don’t like it if it’s just sweet. My partner happened to go shopping and came back with this gigantic lemon one size bigger than a tennis ball, I knew straight away that it’s only for show. I cut the lemon and tried to get the juice out, but I wasn’t surprised when only 1 tsp came out of 1/2 a lemon (my partner often falls for big ingredients lol).

Note: this recipe is a healthier version of the crumble with a reduced amount of sugar and flour. I have added some oatmeal to the dish instead to obtain the crispiness. 


PEAR CRUMBLE 

Prep-Time: 15 mins                   Serve: 4-6

Cooking Time: 30-45 mins

Ingredients 

4 pears, peeled and slicedd

2 tbsp raw honey

1 tsp grounded ginger

1/2 tsp cinnamon

1 1/2 tsp lemon juice

1/2 lemon rind

topping 

1/2 cup plain flour, wholemeal preferred

3/4 cup rolled oats

150g softened butter at room temperature, cut into small pieces

1/4 cup brown sugar

1/2 tsp grounded ginger

1/2 tsp lemon rind

Method 

Preheat oven at 190°C Fan.

Combine the ingredients together in a baking dish, stir to mix and spread all the ingredients to make an even base.

Combine all of the topping ingredients together in a medium mixing bowl, with your hands squeeze the flour into the butter and mix until it becomes crumbs and well combined. Little by little sprinkle the crumbed mixture onto the prepared pear dish until all parts are covered. Bake in the oven for 45 minutes – 1 hour or until the top crumble becomes golden brown. Serve hot-warm on its own or with favourite ice-cream. Enjoy!


GARLIC STUFFED STEAK AND BEETROOT SALAD

Despite my braces I still love rump steak. I’ve posted this steak marinate recipe back about 2 years ago before the post got deleted earlier this year. I’m bringing my steak marination recipe back to a new post with a twist and serving it with a beautifully made beetroot salad, one of my favourite salads. I’ve probably talked about this already in my grill recipes, but here we go again just a small reminder to stay healthy. Always marinate your meat first before cooking, we all know that marinating meat before cooking helps to tenderise and enhance its flavour. Marinating meat before cooking also helps to reduce/prevent the formation of carcinogenic compounds that cause cancer, especially when burning meat or cooking meat on high temperatures such as grilling and bbqing. Also remember to stop eating burnt meat and other burnt foods in general, the burnt black parts of the food also contain cancer causing formulas. There’s no scientific proven tests regarding to this matter (mostly due to no one wanting to be the test subjects), but it’s always better to be healthy than sorry.

The seasoning I used to marinate my steak today is the classic Cambodian marination which includes salt, sugar and stock/fish sauce. The stock and fish sauce helps to enhance the flavour as well as tenderise the meat. I often leave it to marinate for a minimum of 15 minutes and maximum over night to allow the seasoning to marinate the meat inside and out. Therefore when it is served it’s less likely you’ll need extra sauce or gravy to get more flavour.


STEAK AND BEET SALAD

Prep-Time: 20 mins                  Serve: 3

Cooking Time: 1 hr

Ingredients

3 pieces rump steak

1/2 tsp salt

1 tsp sugar

1 tbsp fish sauce

1 cube of stock powder

6 cloves garlic, halfed

2 fresh rosemary, leaves

3 tbsp olive oil

salad

Salt and pepper

2 bunch baby beetroots/ 6 beetroots, quartered

100g baby rocket

50g feta cheese

3 tbsp olive oil

1 tsp apple cider vinegar

4 baby carrots

Method 

Marinate the steak with sugar, salt, fish sauce and stock powder by massaging the seasoning into the steak and then leave it to set for 15 minutes or over night for the best results.

Preheat oven at 180°C Fan Force.

Cut the top of the beetroot (save the leaves for other dishes or for a salad) peel an cut into quarters. Place the beetroot and the carrot in a baking tray, drizzle the oil over them and then rub to cover all sides with oil. Next sprinkle some salt and pepper on top and also add the 6 whole garlic cloves into the baking tray and then cover the tray with aluminium foil and bake in the oven for 45 minutes to 1 hour. Remove from the oven after 45 minutes and leave to cool.

Remove the garlic from the beetroot tray and peel off the skin. Make 2 holes in each piece of steak with a pointed fruit knife. Stuff each piece of garlic into the hole made in the steaks. The cooking process takes longer than it normally would because the steaks are thicker. We also don’t want the steaks to burn so to prevent that from happening flip the steaks more often then if you were bbqing for example.


Start by heating the oil in a pan over medium high heat, place each steak in to the pan facing away from you. Sear all four sides of the steak for 2 minutes each or until each side starts to brown. After all sides have been seared flip the steak back to the larger side and cook for another minute and do the same to the other sides. Do the flipping a few times for each piece, depending on how cooked you want your steak to be, it may take longer if you want it to be well done. I flipped mine at lease 4 times for all sides until the centre top of the steak puff starts to go down and when pressed with a finger it’s still soft but you can also feel a slight hard force forcing back (if the steak feels very soft and the centre top is very puffy the steak is rare). Remove from heat and leave to rest.

make salad

Remove the beetroots and carrots from the baking dish and place into a salad bowl and then add in the rest of the ingredients into the same bowl and then toss to combine. Serve with the steaks.


SEAFOOD FETTUCCINE

Egg Fettuccine is a great source of protein and good carbohydrates, just what our body need. It is plain on its own, but taste great with many other things. Pasta is part of our daily diet, it is delicious and their dishes are simple to make and cost effective. I used to order pasta dishes in the past, but stopped because each time I tried them in restaurants they didn’t wow me the way I expected them to and also because I cook pasta regularly at home so I stopped ordering pasta when eating out. I love seafood with pasta, but from the ones I’ve tried in restaurants they often smelled very fishy which put me off because it made me feel sick. I’m not saying all restaurants make bad seafood pasta dishes, just the ones I’ve been to weren’t the best (if you have been to one and have any recommendation, I would love to try them out). My partner likes to spoil me with seafood even though he can’t eat most of them, he got me some seafood marinara so I can make something nice for myself (love). I made this recipe using what I like and what I have in my fridge which is not much at the moment. This seafood fettuccine is heart-warming for me, it turned out so good I had it all in one meal. Give it a go and share your version of the recipe and thoughts about it.

Note: use any white wine you prefer, I used chardonnay from Beelgara it’s what I normally use for cooking.

Like always skip the chilli if you’re not a fan.


SEAFOOD FETTUCCINE  

Pre-Time: 5 mins                        Serve: 1-2

Cooking Time: 8 mins

Ingredients 

300g seafood marinara

1 red onion, chopped

9 cherry tomato, half

1 hot chilli, chopped

2 cloves garlic, minced

1/2 cup white wine

3 tbsp olive oil

salt and pepper to taste

2 tbsp chopped coriander

2 serving fettuccine, cook as instructed

Method 

Bring water to boil, add in olive oil and 1/2 tsp salt. Add in the fettuccine into the boiling water and cook for 10-13 minutes or as instructed.

Heat olive oil in a pan over medium high heat, add in the onion and cook for 2 minutes before adding in the garlic and cook for another 2 minutes or until the garlic starts to fragrant. Toss in the tomato and chilli, stir to cook for 1 minute and then add in the salt and pepper and stir to mix. Toss the food in the pan a few times until the tomato is half cooked.


Pour in the wine and leave to cook for a few seconds to get rid of the alcohol content. Add in the seafood marinara into the pan and stir for 2 minutes until cooked. Sprinkle with chopped coriander and toss to mix, remove the fettuccine from the water and transfer on to the pan, toss around to combine and allow the fettuccine to coat with sauce.


SLOW ROASTED PORK BELLY

Slow roasted pork belly, a great way to make a cheap cut of pork taste soo goood! What I often like to do with pork belly or pork shoulder is to slow roast it, let the fat melt away and then let the meat soak in the flavour and become tender.

A pork recipe I love is crackling pork belly/shoulder served with mustard sauce, but since I make it quite often my partner was keen to try something new and bought home some pork belly and asked me to cook a different style roasted pork belly (like at a fancy restaurant, he said). I love spices and I know they go very well together, I went to my spice cupboard and found a jar of my grounded fenugreek hidden in the corner, the combination of spices and pork was heaven. I marinated the pork belly with a few other spices and then slow roasted it in 1/2 a bottle of chardonnay surrounded with flavourful pre-cooked veggies for 2 hours. The plan was to serve it with mash, but guess what? The potatoes I added to the roasting tray also absorbed the sauce and they tasted really good whole so I served them the way they were.

Note: you can’t really go wrong with slow roasted pork belly, but what I prefer when cooking pork belly is to have the skin crispy. Not as crispy as the crackling, but crispy enough so it wouldn’t be soggy and taste like fat. To get the crispiness I wanted, I marinated the pork skin with just enough salt to allow the skin to harden while roasting. Also to maintain the crispiness of the skin, its important to remember to never add cold water into the hot tray which will steam and soak the skin. Another thing to keep in mind is not to overfill the vaking tray with liquid; instead when filling the tray only add enough liquid to a level below the skin.

Marking a shallow line around the potatoes helps to allow the potatoes to season by absorbing the sauce while roasting. 

Cook everything in the same baking dish if it’s oven safe, I transfer it from my pan to a glass oven dish because my pan isn’t oven safe. I didn’t cook my sauce in the glass oven dish because it’s a bit long for my stove top. 


SLOW ROASTED PORK BELLY 

Prep-Time: 10 mins                      Serve: 2

Cooking Time: 2 hrs

Ingredients 

500g pork belly

1 tsp fenugreek

1/2 tsp cumin seeds

Salt for rub

3-4 potatoes

sauce 

1/2 bottle white wine, chardonnay

8 whole peppers

2 bay leaves

1 star anise

2 coriander root

4 cardamon

1 red onion, chopped

1 brown onion, chopped

2 cloves garlic, smashed

8 cherry tomato, halfed

1 cup water

1 tsp salt

3 tbsp olive oil

Method 

Preheat oven at 180°C Fan Force.

Wash and pat the pork belly dry. Placing on a chopping board with skin facing up score the skin with a sharp knife into diamond shapes. Rub the skin with fenugreek, 1 tsp grounded salt or enough salt to cover the whole skin area. Sprinkle the cumin seeds between the diamond shapes then rub and press the cumin seeds down into the skin and fat to secure. Rub off the extra spices on your hand onto the bottom side of the pork belly and set a side.

Heat oil in a pan/oven dish over high heat, toss in onions, coriander roots and garlic into the heated oil and then cook for 2 minutes to soften the onions. Now add in the chopped tomatoes, bay leaves, pepper, star anise and cardamon. Stir for another 2 minutes to allow the tomatoes to soften a little and allow the spices to give out fragrant.


Make room in the middle of the pan/oven dish and place the pork belly skin down to sear for 3-5 minutes or until the skin partly cooked. Turn the pork belly over and leave it to cook for another 2 minutes before adding the wine. Once adding the wine, let it cook for 3 minutes to get rid of the alcohol contents and then pour in the water and salt. Let it come to a boil and then transfer into an oven dish (if you are using a pan and the pan is not oven safe). Place in the oven and cook for 1 hour and 45 minutes to 2 hours.


Wash and mark a shallow line around the potatoes. After the pork belly has been roasted for 45 minutes, place the potatoes in the same tray around the pork belly and leave to roast for further 1 hour to 1 hour and 15 minutes. Remove from the oven after 1 hour and 45 minutes – 2 hours and leave it to cool for a bit before plating.

Transfer the sauce into a sauce pan and cook the sauce for 5-7 minutes to reduce and then top the reduced sauce onto the plated roasted pork belly and potatoes.


CHICKEN FRIED RICE

How much do you love fried rice? There are many ways to make fried rice and they all taste amazing. I often make fried rice on my busy or lazy day, because it’s easy and quick to make and also cost effective. When cooking fried rice, I often cook them the Cambodian way and using the simple seasoning of the combination of salt, sugar and fish sauce. Those 3 seasoning make almost every Cambodian food taste great. See how I made this fried rice by visiting my Facebook page and check out the video.

Note: if you prefer to use a different type of meat for this recipe feel free to do so. 

I used 3 crabs brand fish sauce, you can find it in any asian grocery store. I personally think this fish sauce brand tastes the best, but if you can’t get a hold of that brand feel free to use any other fish sauce you find from your local markets. If you don’t like the smell of fish sauce, try using mint sauce or soy sauce instead. 

The flavour of the fried rice can be adjusted by altering the seasoning to your liking, this recipe is made to my preferred taste. Not sweet and not salty, just right for me. 


CHICKEN FRIED RICE

Prep-Time: 7 mins                      Serve: 1

Cooking time: 8 minutes

Ingredients

1 cup cooked jasmine rice

1 stork spring onion, chopped

1 small carrot, chopped into small pieces

6 snow peas, chopped

3 garlic cloves, minced

1 drumstick, thinly sliced

1 egg, beaten

4 tbsp olive oil

1 1/2 tsp fish sauce

3/4 tsp sugar

1/2 tsp salt

Method

Heat oil in a pan over medium high heat, add in the garlic once the oil is heated and cook the garlic until it turns golden brown. Toss in the chicken, turn the heat to high and then stir for 1 minute to allow the chicken to cook out the excess liquid which helps to prevent the garlic from burning. Add in the salt, sugar and fish sauce and then continuously stir to cook the chicken until completely white and cooked through.

Add in the carrots and cook for 2 minutes to soften up and then add in the snow peas and give it a quick stir. Now pour in the rice and stir until the rice is well separated and mixed with the rest of the ingredients. Sprinkle the spring onion and stir to mix again. Make a circle in the middle of the pan and then pour in the beaten egg, scramble the egg for a minute and then mix in with the fried rice and continue to stir until all parts of the scrambled egg are cooked. Remove from the heat and transfer onto a serving plate.


MOROCCAN CHICKEN BREAST WITH PEAS AND AVO MASH

Do you get tired of dishes with Moroccan spice? I don’t think I can. I must have mentioned this everywhere by now, I am crazy about Moroccan spice at the moment. The aroma and flavour of the spice is just so unforgettable! I don’t often grill or bake chicken breast because it’s very lean and it drys out quickly. When I open my cupboard and see the spice sitting there calling me again, the thought of chicken breast pops in to my mind and I couldn’t get it off my head until it’s finally made!

The perfectly cooked Moroccan chicken breast goes so well with this creamy peas and avo mash. Never say good food is complicated and takes forever to cook, because this one doesn’t. Instead of going out to get gourmet food for lunch or dinner, you can make one from home with less cost and effort and probably impress your partner and family with it.

Note: morrocan spice burns quickly when the pan is too hot or when the oven is too hot. To prevent the outer part of the breast from burning and having an unevenly cooked texture, I recommend heating the oil in the pan on medium low – medium heat and turn the chicken breasts over more than once. If you decide to use the oven it is probably best to cook the chicken in aluminium foil or add small amount of water into the baking dish and cover with foil.  


MOROCCAN CHICKEN BREAST WITH PEAS AND AVO MASH

Prep-Time: 15 minutes                     Serve: 2

Cooking Time: 20 minutes

Ingredients

2 single chicken breasts

1 1/2 tbsp moroccan spice

a good pinch of salt

3 tbsp olive oil

peas and avo mash 

1 1/2 avocado

1 cup frozen mint peas/fresh split peas

1 lemon juice

1 tbsp chopped parsley

1 tbsp chopped coriander

1 1/2 tbsp almond oil/olive oil

salt and pepper to taste

moroccan sauce 

1/2 onion

1 garlic cloves

1 tbsp moroccan spice

1 tbsp tomato paste

2 tomato, chopped

1/4 cup water

1 tbsp parsley

salt to taste

Method 

Season both sides of each chicken breast with salt (be generous with the salt), pepper as well as the moroccan spice and then rub the seasoning in to both sides of the chicken breasts. Set a side to rest for 15 minutes.


Preheat oven on 180°C Fan Force

Bring water to boil in a small pot, add in the peas and boil for 2-3 minutes, drain. Place the peas, 1 avocado, lemon juice, parsley, coriander and the oil in a bowl and mash with a fork or with a stick blender into chunky mash. Add in the rest of the avocado, salt and pepper to taste. Leave in the oven to keep warm. Prepare a baking dish with 1/4 cup of water it.

cooking in the oven – Heat the oil in a frying pan over medium high heat, place the marinated chicken breasts into the heated pan facing away from you and sear the chicken breast for 1 minutes on both sides. Transfer into the prepared baking dish and then cover with aluminium foil and cook in the oven for 15 – 20 minutes or until the chicken is cooked through.

cooking in a pan – Heat the oil in a frying pan over medium low heat, place the marinated chicken breast into the heated pan facing away from you. Check the breast after a minute and if the chicken isn’t white yet leave it to cook longer. If the breasts start to brown flip it over and do the same to the other size. With your cooking tongs press the top of the breast to check if it’s cooked through and if it’s still soft and bounce back it needs to be cooked a little longer, when this happens it’s best to flip it over and leave it to cook for a minute and then flip back and cook a little longer until the meat stops bouncing back when its pressed down, by flipping it back it helps to prevent it from burning. Remove from the pan and leave it to rest.

moroccan sauce- place garlic, tomato, parsley and water in a blender. Blend the ingredients until finely grounded for 1 – 2 minutes. Add the onion into the same pan used to cooked the chicken, cook until turn transparent and then pour the blended ingredients into a saucepan and bring to a simmer over medium heat, add in the tomato paste, moroccan spice, salt and pepper and then stir. Remove from the heat once the sauce thickens. Pour the sauce from the pan or from the oven dish into the pan, stir to mix.


Place peas and avo mash on a serving plate, place a cooked chicken breast on top and finally pour the sauce over the chicken to finish the dish. Ready to serve.


PEAS AND MUSHROOM RISOTTO

Risotto is a quick and easy dish which can be made for a starter or as a main dish at any meal time. It is wonderful to try different styles of risotto or even create one yourself. If you are a starter in making risotto maybe stick to the classic chicken and mushrooms risotto. This recipe I’m sharing today is a chicken and mushroom risotto with a twist so it taste slightly different to the original. Risotto is a flavourful dish, but if you ask me how often I would eat risotto I would say once every 2 months or longer, but if you ask my partner this question he would say twice a week-it just shows how much he loves it. For me risotto is very similar to most Asian congee.

Different people make risotto in different ways so I wouldn’t say there’s a right or wrong way of making it as long as you know when the rice is cooked. It often takes about 20 minutes to cook the arborio rice, but that varies depending on your stove and heat level. One thing about risotto is that it takes a lot of liquid to cook the rice from about 3-5 cups of broth/water, this also depends on the amount of rice used and how cooked you want your rice to be.

Note: it is important to keep an eye on the risotto every few minutes while cooking as the liquid disappears very quickly which can easily cause the base of the risotto to burn. So to help avoid any burning remember to stir it frequently and add more liquid when it starts to dry out.  

I recommend adding 1 cup of liquid at a time because as mentioned earlier, the liquid dries out pretty quick. 

I use water and flavour the dish with salt, but feel free to use stock like the original recipes do if you prefer. Keep in mind to use less or no salt if you are using stock instead of water. 


PEAS AND MUSHROOM RISOTTO 

Prep-Time: 10 minutes                       Serve: 3

Cooking Time: 30 minutes

Ingredients 

1 large chicken breast, sliced

1 1/2 cup arborio rice

1 cup white wine

3 1/2 cup water/chicken stock

1 onion, chopped

1 1/2 cup sliced mushrooms

1/2 cup frozen mint peas (use fresh peas if available)

1/2 tsp nutmeg

3 garlic cloves, minced

1 1/2 tbsp shredded parmesan cheese

Salt to taste

3 tbsp olive oil

5 basil leaves to garnish

Method

Heat the oil in a pot over medium high heat, add in the mushrooms and onion once the oil is heated. Sauté the mushrooms and onion for 3 minutes or until the mushrooms have shrunken down. Add in the garlic, nutmeg, peas and salt and then stir to cook the garlic for 1 minute. Add in the chicken and cook until most parts of the chicken turn white.

Add in the rice, wine and a cup of water/chicken stock. Leave the pot to boil and then reduce heat to medium. Allow to simmer down until most of the liquid is absorbed by the rice, add in another cup of water and leave to simmer down again. Continue to add more liquid once the liquid is absorbed by the rice until the rice is cooked through and there’s no more white hard spots remaining on the rice grains.


Remove from the heat and sprinkle the parmesan cheese on top, stir to combine and allow the cheese to melt into the rice. Transfer onto a serving dish and top with a bit more parmesan cheese and chopped basil.


MOROCCAN MEATBALLS

Moroccan spice is very unique and aromatic, it’s goes well with almost every meat you can think of. It’s great with the grill or in a stew. I’m one of those people who love aromatic food, the strong flavour of herbs and spices always taste so wonderful. I personally love Moroccan lamb, it always remind me of my childhood visiting Australia and grandma always cooked Moroccan lamb with roasted veggies. Other than lamb, it’s pork, if you haven’t tried this mouth-watering combo then check out my Moroccan pork belly! I highly recommend you do 😉

The last time I made Moroccan meatballs was 3 years ago and I haven’t made it since until last night. The last time we had it it was with plain couscous and I am not a big fan of plain couscous – because I also added some breadcrumbs and egg to the mixture, so it turned out a bit sticky and I didn’t really like the flavour. Even though my partner loved it and always wanted me to make it again, I didn’t because of the flavour. Now that I found this great Moroccan spice from Green Valley Spices I couldn’t resist and made this recipe again but this time without breadcrumbs and egg and it was beautiful.

Note: I like using fresh ingredients in my cooking so I used fresh tomatoes in this recipe, if you prefer the traditional way using a can of diced tomatoes feel free to do so if its more convenient for you.

Because I’m not a big fan of plain couscous, I made a couscous salad to go with the meatballs instead. However you can serve it with whatever you prefer. 


MOROCCAN MEATBALLS

Prep-Time: 20 mins                                Serve: 3

Cooking Time: 30 mins

Ingredients

4 tomatoes, diced small/ 1 can of diced tomatoes

3 cloves garlic

1 onion, chopped

1 tsp mild paprika

3 tbsp chopped parsley

salt and pepper to taste

meatballs

500g lamb mince

1 small onion, chopped

1/8 cup pine nut

1/4 cup sultanas

4 tbsp chopped parsley

2 tbsp moroccan spice

salt and pepper to taste

3 tbsp olive oil

couscous salad

1/2 cup couscous (cooked as instructed on the package)

1 Lebanese cucumber, chopped

1 tomato, chopped

1/2 corn, boiled and removed from cob

1/4 bunch parsley, chopped

1 tbsp lime/lemon juice

1/4 cup raw almond, lightly grounded

salt and pepper to taste

Method

Combine all of the meatball ingredients in a medium sized mixing bowl. Mix together until well combined and grab portions of the mince mixture and mould into a ball, repeat till finished.

Heat oil in a pan over medium high heat, add the meatballs into the pan once the oil is heated and sear all sides to brown. Transfer on to a plate and set aside.

Add the onion in to the same pan used to sear meatballs. Cook the onion until transparent and then add in the garlic, paprika and tomatoes. Cook the tomatoes for 7-10 minutes or until broken down and then season with salt and pepper (add some water if gets to dry).


Return the meatballs to the pan and reduce the heat to medium low. Allow it to slowly simmer and cook for a further 5 minutes or until the meatballs are cooked through. Remove from the heat and sprinkle the pan with chopped parsley, stir to mix and set aside.

Combine couscous with 1/2 cup of boiling water and leave it to set for 2-3 minutes.

Combine all of the couscous salad ingredients in a salad bowl to mix to create the couscous salad. Transfer on to a serving plate and top with the meatballs.